Satochip is one of the first hardware wallet manufacturers to natively support the storing of eCash. Unlike the Ledger or Trezor hardware wallets, the Satochip wallet consists of two separate components.


The first component is the card wallet which contains the cryptographic key for your eCash wallet, and the other is the card reader where you insert your card. They both work together to communicate with your Electrum ABC wallet to sign transactions.
This user guide will help you set up your Satochip wallet, as well as using it in conjunction with the Electrum ABC Desktop Wallet. These instructions are also available as a video.
Wallet Setup
When you receive your Satochip wallet, there are a few steps to set up your wallet for eCash use.
First, open your Electrum ABC wallet, then click on File, New/Restore, and then give the wallet a name and click Next.


On the next screen, select ‘Standard Wallet’ for the wallet to be created and then click Next.

On the keystore screen, make sure your Satochip card reader is plugged into your computer if not already, then select “Use a hardware device” and click next.

On the following screen, insert your Satochip card into the card reader and wait for a few seconds for your computer to recognize your device.


On the following device screen, select the device that corresponds to your Satochip device then click Next.

You will then be prompted for a PIN to secure your device. The Satochip hardware wallet comes with this extra security feature much like your bank card. This is needed every time you want to open the wallet. Enter your desired PIN and click OK.

Then select Create a new BIP39 seed to generate a new 12 word mnemonic seed phrase for your wallet.
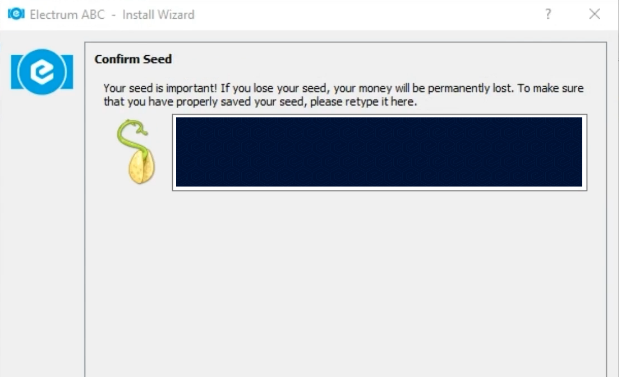
IMPORTANT: Make sure to write down this seed phrase and keep it in a safe place. Failure to do so could result in the loss of all your coins if you lose your Satochip card.


Because this seed phrase is the most important thing that Electrum ABC will ask you, you will be asked to type it again to confirm.

On the derivation path screen, ensure it is set to the eCash path used by Electrum ABC, being m/44’/899’/0’. Then click Next.

On the final screen, you will be asked to confirm whether you want to encrypt the wallet file. It is a recent feature since Electrum ABC version 5.0.3. It uses a special key generated by the hardware wallet to encrypt the wallet file, so that your eCash addresses are not plainly stored on your computer.

Click Next and you’re now all set up to use your Satochip device with the Electrum ABC wallet.

Wallet Usage
Now that you’re good to go, getting the receiving address is as easy as clicking on the “Receive” tab of the Electrum ABC wallet. Sending XEC to this eCash address is essentially storing it in the hardware wallet you just set up .

When Sending eCash from this hardware wallet, it’s the same as your usual Electrum ABC steps, and as long as your card wallet is inserted into the card reader you won’t need any additional steps.

You’ll also notice the green satochip logo in the lower right corner of your Electrum ABC wallet. If Electrum was not able to pair correctly with your Satochip wallet, then it will be showing a red indicator.
![]()
Clicking on this Satochip logo in the corner will display an advanced configuration tool. At this point in time, the only option we recommend using is the Change PIN option, as the other options are still being refined.

So there you have it, a hardware wallet that can natively store eCash and serves as an alternative to Ledger and Trezor devices. If you have any technical enquiries regarding the Electrum ABC wallet or the process of using it in conjunction with the Satochip card wallets, please feel free to hop on to the official Electrum ABC Telegram Group.